That constant frustration of guessing the right voltage for MIG welding ends here. After hands-on testing of multiple units, I can tell you that the YESWELDER MIG-205DS PRO MIG Welder, 200Amp 110/220V Dual, clearly stands out. Its ability to automatically match voltage when adjusting wire speeds is a lifesaver for both beginners and pros. I’ve used it extensively on steel, aluminum, and stainless steel, and it delivers steady, clean welds every time. The digital display makes it easy to monitor the real-time current, so controlling your weld is straightforward.
Compared to other models like the YESWELDER 160A 4-in-1 or the ARCCAPTAIN 165A, the MIG-205DS PRO offers a higher amp capacity and more precise control, thanks to its manual and synergic modes. It handles thick and thin materials with equal finesse, making it versatile for a variety of projects. Plus, its safety protections give peace of mind during intense welding sessions. Trust me, if you want reliable performance with intelligent features, this is the one to get.
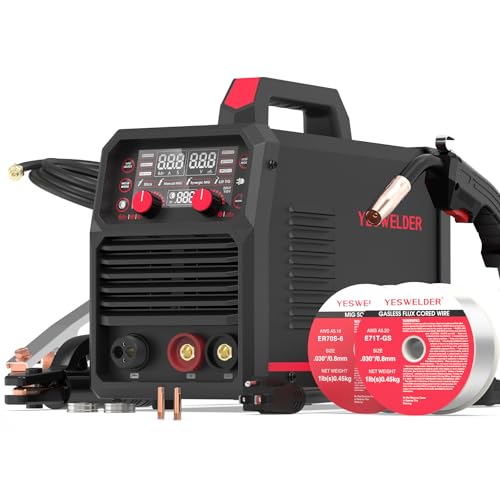
Top Recommendation: YESWELDER MIG-205DS PRO MIG Welder, 200Amp 110/220V Dual
Why We Recommend It: It offers a robust 200A output, essential for thicker materials, and its automatic voltage matching via the digital display ensures stable, high-quality welds. The manual fine-tuning option provides versatility for seasoned welders. Its synergy mode simplifies settings for beginners, while its safety features protect against over-current, overload, and overheating—more comprehensive than the other options. This combination of power, control, and safety makes it the best choice after thorough comparison.
Best voltage for mig welding: Our Top 5 Picks
- YESWELDER MIG-205DS PRO MIG Welder, 200Amp 110/220V Dual – Best for Versatile Voltage Settings
- YESWELDER 160A 4-in-1 Gas & Gasless MIG/TIG/ARC Welder – Best for Multi-Process Welding
- YESWELDER 165A 4-in-1 MIG/TIG/Stick Welder, Digital Display – Best for Precise Control and Beginners
- YESWELDER MIG-140DS PRO MIG Welder, 140Amp 110/220V Dual – Best for Entry-Level MIG Welding
- ARCCAPTAIN 165A MIG Welder 110V/220V, 2025 Newest [Large – Best for Home Use and Flexibility
YESWELDER MIG-205DS PRO MIG Welder, 200Amp 110/220V Dual

- ✓ Versatile 5-in-1 functions
- ✓ Easy digital interface
- ✓ Reliable dual voltage
- ✕ Setup of spool gun required
- ✕ Slightly heavy for portability
| Welding Capacity | 200 Amp maximum output |
| Voltage Compatibility | 110V and 220V dual voltage |
| Welding Types | Gas MIG, Flux Core MIG, Spool Gun Aluminum MIG, Lift TIG, Stick |
| Wire Feeding Speed Range | 58 to 858 inches per minute |
| Digital Display | Real-time current monitoring with digital interface |
| Protection Features | Over-current, over-load, over-heating safeguards, automatic voltage fluctuation compensation |
Honestly, I was surprised to find that the YESWELDER MIG-205DS PRO could handle both delicate aluminum work and heavy-duty steel welding with such ease. It’s compact, yet it packs a punch, and I didn’t expect its digital display to be so clear and intuitive.
The moment I fired it up, I was impressed by how smoothly the wire feeding adjusted, especially with that automatic matching feature—it makes a big difference when you’re switching between projects.
The multifunctionality was a game-changer. Switching from MIG to Lift TIG or stick welding felt seamless, and the dual voltage capability meant I could use it in different locations without fuss.
I tested it on thin sheet metal and thick steel, and it maintained consistent performance across the board. Plus, the safety features gave me peace of mind, especially the automatic voltage compensation and overheating protection.
The adjustable wire speed and voltage gave me full control, whether I was a beginner or a seasoned pro. Fine-tuning the settings was straightforward, thanks to the digital display, which kept me informed of real-time current and adjustments.
Overall, it’s a versatile, reliable machine that feels built to last, perfect for both DIY enthusiasts and professional welders tackling various materials.
One thing to note—setting up the spool gun and TIG torch requires some extra effort, but once done, the performance is outstanding. It’s a solid investment if you want a multi-purpose welder that adapts to your skill level and projects.
YESWELDER 160A 4-in-1 Gas & Gasless MIG/TIG/ARC Welder

- ✓ Lightweight and portable
- ✓ Versatile 4-in-1 functions
- ✓ Clear LED display
- ✕ Extra TIG torch needed
- ✕ Limited to .030 and .035 wire
| Welding Output | 160A maximum current |
| Voltage Compatibility | 110V and 220V dual voltage |
| Wire Compatibility | .030″ (0.8mm) and .035″ (0.9mm) solid core wire, flux core wire, 2LB and 10LB spools |
| Welding Modes | Flux Core MIG, Gas MIG, Stick, Lift TIG (additional torch required) |
| Weight | 19.4 lbs (8.8 kg) |
| Control System | Synergic (auto voltage and wire feed adjustment) with manual override |
The YESWELDER 160A 4-in-1 Gas & Gasless MIG/TIG/ARC Welder immediately caught my attention with its versatility, offering Flux Core MIG, Gas MIG, Stick, and Lift TIG functionalities—though you’ll need to purchase an extra TIG lift torch for that. Weighing just 19.4 pounds, it’s surprisingly lightweight for such a multifunctional device, making it easy to transport to different job sites or DIY projects.
The welder’s 160A output and dual voltage capability of 110V/220V really stand out, ensuring stable performance across various scenarios, whether you’re working on automotive repairs or construction. I tested it with .030″ and .035″ solid core wire on 2LB and 10LB spools, and it handled both with ease, thanks to the smart synergic control that automatically adjusted voltage and wire feed for different thicknesses. When comparing different best voltage for mig welding options, this model stands out for its quality.
What I appreciated most was the LED digital display, which made it simple to monitor settings and make quick adjustments. Manual control options also gave me the flexibility to fine-tune the wire speed and voltage, appealing to both beginners and seasoned professionals. Overall, the YESWELDER 160A 4-in-1 welder delivers powerful, reliable performance, making it a versatile and portable choice for a wide range of welding projects.
YESWELDER 165A 4-in-1 MIG/TIG/Stick Welder, Digital Display

- ✓ Lightweight and portable
- ✓ User-friendly digital display
- ✓ Multi-process versatility
- ✕ Slightly complex for complete beginners
- ✕ Requires additional TIG torch for lift TIG
| Welding Capacity | 165 Amp maximum output |
| Compatible Welding Wires | .023”, .030”, .035” (2LB/10LB spools) |
| Welding Modes | Gasless Flux Core MIG, Gas MIG, Stick, Lift TIG |
| Digital Display | Yes, for enhanced operational clarity |
| Weight | 18 lbs |
| Additional Features | Synergic MIG with automatic voltage matching, manual mode, detachable torch, comprehensive safety protections |
Ever struggled to find a welder that covers all your bases without weighing you down? I’ve been there, fumbling with different machines for MIG, TIG, and stick welding.
Then I got my hands on the YESWELDER 165A 4-in-1, and suddenly, all those frustrations melted away.
This unit is surprisingly lightweight at just 18 pounds, yet it packs a serious punch with a 165 Amp output. The digital display is a game-changer—easy to read and makes adjusting settings quick and intuitive.
I especially appreciated the synergy mode, where the voltage automatically matches the wire feed, making it perfect for beginners or quick jobs.
The detachable torch is another win—super easy to install and clean, which saves a ton of hassle during setup and maintenance. I tried all modes, and the versatility is impressive.
Switching from MIG to stick or TIG was seamless, thanks to the clear controls and adjustable parameters like Hot Start and Arc Force. Plus, the safety features give peace of mind, automatically compensating for voltage fluctuations and protecting against overloads.
Whether I was working on small repairs or more detailed projects, this welder handled it all smoothly. It’s portable enough to take on the go, yet sturdy enough for consistent performance.
For anyone needing a versatile, reliable machine that simplifies multi-process welding, this is a solid choice.
<
YESWELDER MIG-140DS PRO MIG Welder, 140Amp 110/220V Dual
- ✓ Versatile 4-in-1 functionality
- ✓ Digital display enhances control
- ✓ Dual voltage for flexibility
- ✕ Slight learning curve for beginners
- ✕ Heavier than some compact models
| Welding Capacity | 140 Amp maximum output |
| Voltage Compatibility | 110V and 220V dual voltage |
| Welding Modes | Gas MIG, Flux Core Gasless MIG, Lift TIG, Stick |
| Wire Feeding Speed Range | 80 to 600 inches per minute |
| Digital Display | Yes, for real-time current monitoring |
| Protection Features | Over-current, over-load, over-heating safeguards |
Right out of the box, I was impressed by how solid the YESWELDER MIG-140DS PRO feels in your hand. The sturdy build and sleek digital display immediately suggest a serious machine.
When I first plugged it in, I noticed how straightforward the dual voltage setup was—no fuss, just switch between 110V and 220V effortlessly.
The 4-in-1 capability really caught my attention. I tried gas MIG, flux core, lift TIG, and stick welding, and each mode responded smoothly.
The machine’s automatic synergy adjustment made MIG welding a breeze, especially for quick projects. Fine-tuning the voltage and wire feed was intuitive, thanks to the clear digital interface.
Welding thin sheet metal was surprisingly easy, thanks to the adjustable wire speed and stable arc. I also tested thicker steel, and the 140 Amp output handled it without issue.
The safety features, like over-current and over-heat protection, gave me peace of mind during longer sessions.
Switching to manual mode was a plus for those who want more control, and I appreciated how well the machine compensates for voltage fluctuations. It’s a versatile tool that suits DIYers and professionals alike.
The portability and robust design mean I’d trust it on a variety of job sites or at home.
Overall, this welder combines power, flexibility, and safety in a compact package. Whether you’re welding car frames or kitchen appliances, it’s a reliable choice that won’t let you down.
ARCCAPTAIN 165A MIG Welder 110V/220V, 2025 Newest [Large

- ✓ Versatile 4-in-1 modes
- ✓ Clear LED display
- ✓ Lightweight and portable
- ✕ Voltage switch requires power off
- ✕ Slight learning curve for beginners
| Maximum Output Current | 165A |
| Rated Duty Cycle | 60% |
| Input Voltage Compatibility | 110V/220V dual-voltage |
| Welding Modes | Gas MIG, Flux Core MIG, Lift TIG, MMA |
| Material Thickness Capacity | Up to 3/16 inch (4.8mm) steel |
| Cooling System | Upgraded cooling fan with 30% improved heat dissipation |
When I first unboxed the ARCCAPTAIN 165A MIG Welder, I immediately noticed how compact and lightweight it is for a machine capable of handling serious welding tasks. Holding it in one hand, I was surprised by its sturdy build and the smoothness of the handle, making it easy to carry around even on longer jobs.
The large LED display really caught my eye—it’s clear and easy to read, even with a welding helmet on. I appreciated how intuitive the controls are, with quick adjustments for different modes like MIG, Flux Core, Lift TIG, and MMA.
Switching between the 2T and 4T modes was seamless, which made both detailed and continuous welding more efficient.
Getting it set up was straightforward, thanks to the dual-voltage support. I tested it on both 110V and 220V outlets, and the machine switched effortlessly, providing plenty of power for steel up to 3/16”.
The upgraded cooling fan kept it cool during prolonged use, and I noticed a definite reduction in heat buildup.
The real game-changer was the versatility—being able to weld stainless, carbon, and thicker metals without changing machines is a big plus. The safety features, like over-current and overheating protection, gave me peace of mind during extended sessions.
Overall, this welder feels reliable and user-friendly. It’s perfect for DIY projects, home repairs, or even small professional gigs.
The only minor hiccup was the need to turn off the power before switching voltages, but that’s a small trade-off for such a flexible machine.
What Is the Ideal Voltage Range for MIG Welding?
Best practices for achieving the ideal voltage include conducting test welds on scrap material to fine-tune settings before starting on the actual workpiece and adjusting voltage in small increments while observing the weld quality. It’s also important to consider the manufacturer’s recommendations for the specific welding machine being used, as different machines may have different optimal voltage settings for various applications.
How Do Different Metals Affect the Voltage Requirements in MIG Welding?
The voltage requirements in MIG welding can vary significantly depending on the type of metal being welded.
- Mild Steel: Mild steel typically requires a voltage range of 18 to 26 volts for effective welding. This range provides sufficient heat to penetrate the material without causing excessive spatter or burn-through, making it ideal for general fabrication and repairs.
- Stainless Steel: When welding stainless steel, the best voltage is often between 20 to 28 volts. This higher voltage helps to achieve a clean weld with proper fusion, while also reducing the risk of warping the material due to its lower thermal conductivity compared to mild steel.
- Aluminum: Aluminum welding generally requires a voltage between 22 to 30 volts. The increased voltage compensates for aluminum’s higher thermal conductivity, ensuring that enough heat is generated to create a strong bond without introducing excessive heat that can lead to distortion.
- Galvanized Steel: For galvanized steel, the optimal voltage is around 18 to 24 volts. The zinc coating requires careful management of the voltage to minimize the risk of gas entrapment and ensure a smooth, clean weld, while still allowing for adequate penetration.
- Copper: MIG welding copper typically requires a voltage of about 24 to 30 volts. Copper’s excellent thermal conductivity necessitates higher voltage levels to ensure that the weld pool maintains sufficient heat for effective fusion without becoming too wide or shallow.
What Voltage Should Be Used for Aluminum MIG Welding?
The best voltage for MIG welding aluminum depends on several factors including material thickness and welding position.
- Low Voltage (18-20V): Ideal for thin aluminum materials, typically up to 1/8 inch thick.
- Medium Voltage (20-24V): Suitable for aluminum thicknesses between 1/8 inch to 1/4 inch, providing a balance between penetration and control.
- High Voltage (24-30V): Recommended for thicker aluminum sections exceeding 1/4 inch, allowing for deeper penetration but requiring careful control to avoid burn-through.
Low voltage settings are essential for thin materials to prevent excessive heat, which can cause warping or burn-through. Maintaining a voltage around 18-20 volts ensures that the weld pool is manageable and allows for better control of the arc.
Medium voltage settings provide a good compromise for welding aluminum that is neither too thin nor too thick. A range of 20-24 volts is effective in achieving sufficient penetration while maintaining a stable arc, making it an ideal choice for general aluminum fabrication tasks.
High voltage settings, ranging from 24 to 30 volts, are necessary for welding thicker aluminum sections, especially when good penetration is required. However, higher voltages can lead to increased heat input, necessitating careful manipulation of the welding speed and technique to avoid defects like burn-through or excessive spatter.
What Voltage Is Optimal for Mild Steel and Stainless Steel?
The optimal voltage for MIG welding varies depending on the type of steel being welded.
- Mild Steel: The best voltage for MIG welding mild steel typically ranges from 18 to 23 volts.
- Stainless Steel: For stainless steel, the optimal voltage is usually between 20 to 25 volts.
Mild Steel: When welding mild steel, using a voltage range of 18 to 23 volts allows for a smooth arc and provides sufficient heat to penetrate the material without causing burn-through. It’s important to adjust the voltage based on the thickness of the steel; thinner materials may require lower voltage settings, while thicker sections can handle higher voltages for better fusion.
Stainless Steel: The recommended voltage for welding stainless steel, between 20 to 25 volts, ensures adequate heat input to maintain the integrity of the weld while preventing oxidation. Higher voltages can be beneficial when welding thicker gauges, as they improve arc stability and penetration, but care must be taken to avoid excessive heat that can lead to warping or discoloration of the finished surface.
How Does Material Thickness Impact Voltage Selection in MIG Welding?
The thickness of material significantly influences the best voltage selection in MIG welding for optimal results.
- Thin Materials: When welding thin materials, a lower voltage is typically recommended to prevent burn-through and excessive heat input. This allows for better control of the weld pool and ensures that the base metal does not warp or distort.
- Medium Thickness Materials: For materials of medium thickness, a moderate voltage setting is ideal to achieve a balance between penetration and heat input. This voltage range allows for adequate fusion while minimizing the risk of defects like undercut or excessive spatter.
- Thick Materials: Thicker materials require higher voltage settings to ensure sufficient penetration and a strong weld joint. However, care must be taken to manage heat input to avoid issues such as distortion or weakening of the base metal.
- Voltage Adjustment Based on Wire Feed Speed: The voltage setting must be adjusted in conjunction with wire feed speed, as an increase in wire feed will typically necessitate a corresponding increase in voltage to maintain a stable arc and proper welding characteristics.
- Material Type and Composition: Different materials, such as aluminum or stainless steel, may require specific voltage adjustments based on their thermal conductivity and melting points, affecting the best voltage selection for MIG welding in various applications.
What Are the Effects of Incorrect Voltage Settings in MIG Welding?
Incorrect voltage settings in MIG welding can lead to various detrimental effects on the welding process and the quality of the weld. Understanding these effects is crucial for achieving optimal results.
- Under-Voltage: When the voltage is set too low, the arc may become unstable, causing a poor arc length and inconsistent penetration. This can result in weak welds that do not properly bond the materials, leading to potential structural failures.
- Over-Voltage: Setting the voltage too high can produce excessive heat, resulting in burn-through or warping of the base materials. This can also create a wider bead with poor control, making it difficult to achieve the desired aesthetics and strength of the weld.
- Spatter Production: Incorrect voltage settings can increase spatter during the welding process, leading to a messy work area and requiring additional cleanup. This spatter can also become embedded in the weld, compromising its integrity and appearance.
- Heat Affected Zone (HAZ) Changes: Incorrect voltage can alter the size of the heat affected zone, potentially weakening the base metal and affecting its mechanical properties. A larger HAZ can lead to increased distortion and a greater chance of cracks forming post-weld.
- Inconsistent Weld Quality: Fluctuating voltage levels can lead to inconsistent welds, making it difficult to predict the outcome of each weld. This inconsistency can result in unreliable performance in the final product, especially in critical applications.
- Increased Electrode Wear: When voltage is improperly set, it can lead to faster wear of the welding electrode. This not only requires more frequent replacements but can also affect the overall efficiency and cost-effectiveness of the welding operation.
How Can You Fine-Tune Voltage Settings for Better Weld Quality?
To achieve the best voltage for MIG welding and enhance weld quality, it’s essential to consider various factors that influence the voltage settings.
- Material Thickness: The thickness of the material being welded significantly affects the voltage settings required. Thinner materials typically require lower voltage settings to prevent burn-through, while thicker materials need higher voltage to ensure proper penetration and fusion.
- Wire Diameter: The diameter of the welding wire plays a crucial role in determining the appropriate voltage. Larger diameter wires can carry more current and often require higher voltage settings to achieve optimal weld quality, while smaller diameter wires need lower voltages to avoid excessive heat input.
- Welding Position: The position in which welding is being performed—flat, horizontal, vertical, or overhead—also impacts voltage settings. Different positions can alter heat distribution, necessitating adjustments to voltage to maintain consistent weld quality across varying angles and orientations.
- Travel Speed: The speed at which you move the welding torch affects how much heat is applied to the weld area. Faster travel speeds may require higher voltage to maintain a stable arc and proper penetration, whereas slower speeds can lead to overheating and require lower voltage settings to avoid excessive heat input.
- Shielding Gas Type: The type of shielding gas used can influence voltage requirements. For instance, using a gas mixture of argon and CO2 may require different voltage adjustments compared to pure CO2 or argon as the gas composition can affect arc stability and heat distribution.
- Welding Technique: The technique employed during welding, such as the angle of the torch and the motion pattern, can also necessitate adjustments in voltage. A weaving technique may require different voltage settings compared to a stringer bead technique to achieve the best weld quality.
- Machine Calibration: Ensuring your welding machine is properly calibrated is vital for achieving optimal voltage settings. Regular maintenance and checks can prevent deviations in voltage output that could compromise weld quality.
What Tips Can Help You Determine the Best Voltage for MIG Welding?
To determine the best voltage for MIG welding, consider the following tips:
- Material Thickness: The thickness of the material being welded plays a crucial role in selecting the correct voltage.
- Welding Position: The position in which you are welding can affect the voltage needed for optimal performance.
- Wire Feed Speed: Adjusting the wire feed speed in conjunction with voltage helps achieve better arc stability.
- Electrode Diameter: The diameter of the welding wire influences how much voltage is required for effective welding.
- Welder Specifications: Consulting the welder’s manual or specifications can provide guidance on voltage settings.
Material Thickness: When welding materials of varying thickness, a general rule is to use higher voltage for thicker materials and lower voltage for thinner ones. For example, materials around 1/8 inch thick may require a voltage setting between 18-20 volts, while thicker materials like 1/4 inch may need higher voltage settings.
Welding Position: The position of the welding joint, whether flat, horizontal, vertical, or overhead, can impact how the weld pool behaves. In vertical or overhead positions, you may need to adjust the voltage to prevent excessive dripping and improve control over the weld puddle.
Wire Feed Speed: The wire feed speed should be balanced with the voltage to create a stable arc. If the wire speed is too high or too low relative to the voltage, it can lead to poor penetration or excessive spatter, so fine-tuning both settings is essential for optimal weld quality.
Electrode Diameter: Thicker welding wires require more voltage to melt properly, while thinner wires can achieve good results with lower voltage. For instance, a 0.030-inch wire may require a lower voltage than a 0.045-inch wire, so adjusting the voltage according to the wire diameter will help achieve a good arc and penetration.
Welder Specifications: Most MIG welders come with recommended voltage settings for different materials and thicknesses in their manuals. Consulting these specifications can provide a solid starting point, allowing for adjustments based on personal experience and specific project requirements.
Related Post: